Window Installation
The following window installation sequence details is applicable to Wall Section 1 (Wall Section 2 details would be almost identical - with the elimination of wood sheathing behind the housewrap)
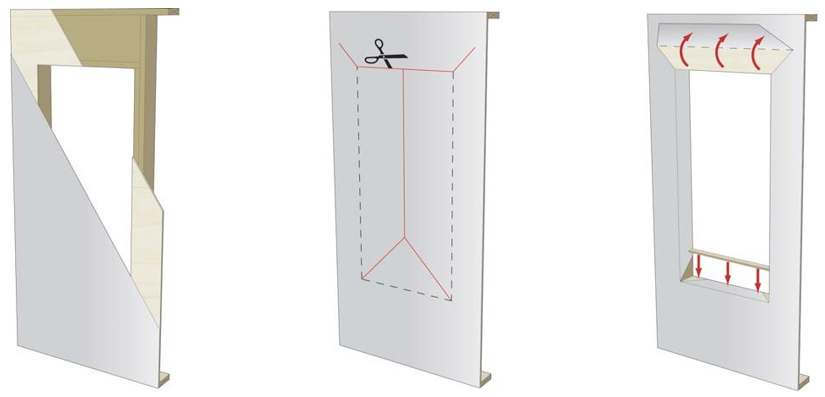
- Wood frame wall with OSB and housewrap
- Modified "I" cut in housewrap
- Housewrap folded in at jambs and sill. Housewrap at head temporarily folded up or, alternatively, tucked under; Install backdam.
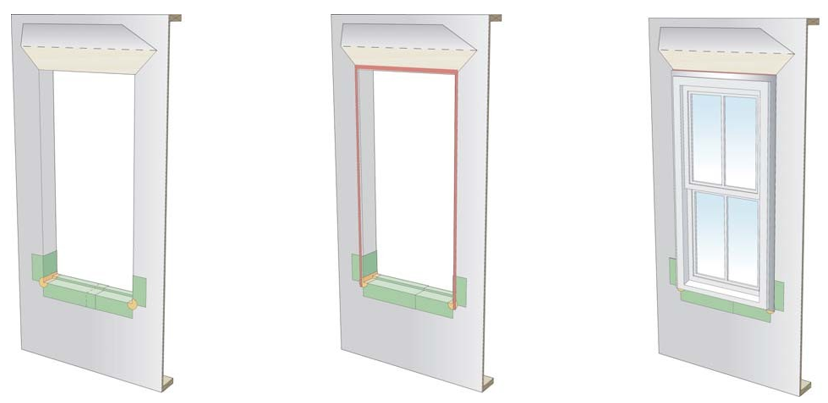
4. Install adhesive backed sill flashing and corner flashing patches at sill.
5. Apply sealant at jambs, head and sill. Alternatively, sealant can be applied to the back side of the nailing flange (sealants, housewraps, and flashings must be chemically compatible).
6. Install window plumb, level, and square as per manufacturer's instructions.
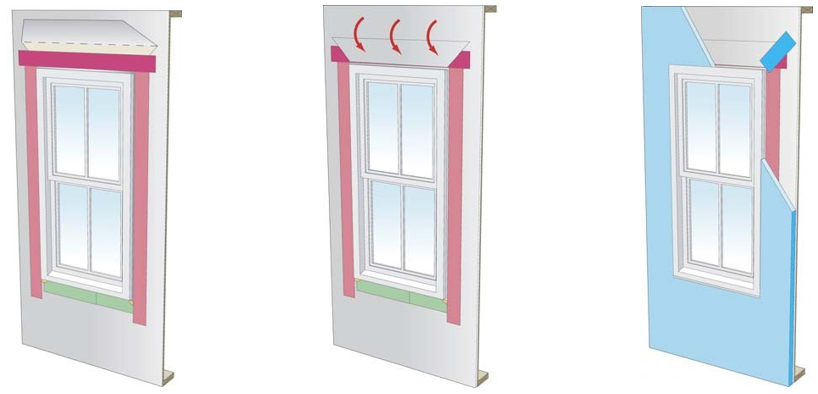
7. Install jamb flashing first; Install a drip cap (if applicable); Install head flashing.
8. Fold down head housewrap
9. Apply corner patches at head; Air seal window around the entire perimeter on the interior with sealant or non-expanding foam; Install foam sheathing over housewrap.
The following window installation sequence details are applicable to Wall Section 4 (Wall Section 3 details would be almost identical - addition of housewrap to the exterior of the insulating sheathing prior to window rough opening preparation)
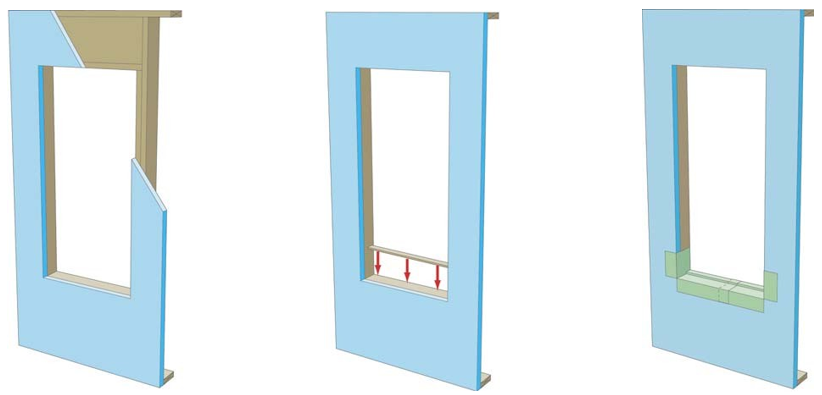
- Install foam sheathing on wood frame wall.
- Install backdam.
- Install first piece of adhesive backed sill flashing; apply second piece of adhesive backed sill flashing.
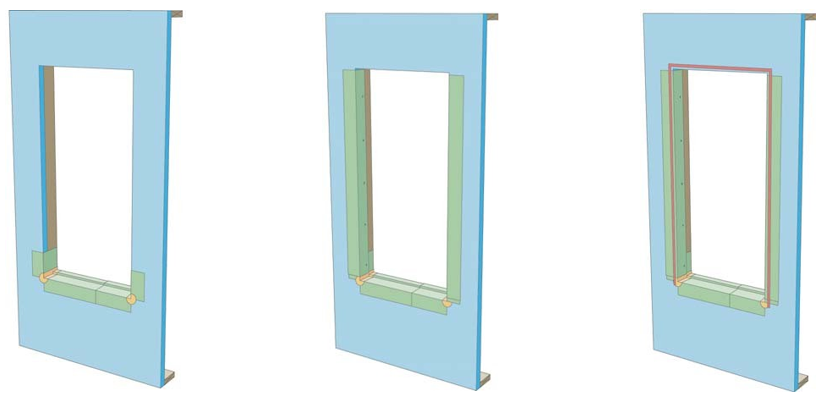
4. Install corner flashing patches at sill.
5. Install adhesive backed jamb flashings (jamb flashing adhered to foam and stapled to frame)
6. Apply sealant at jambs, head and sill. Alternatively, sealant can be applied to the back side of the nailing flange (sealants, housewraps, and flashings must be chemically compatible).
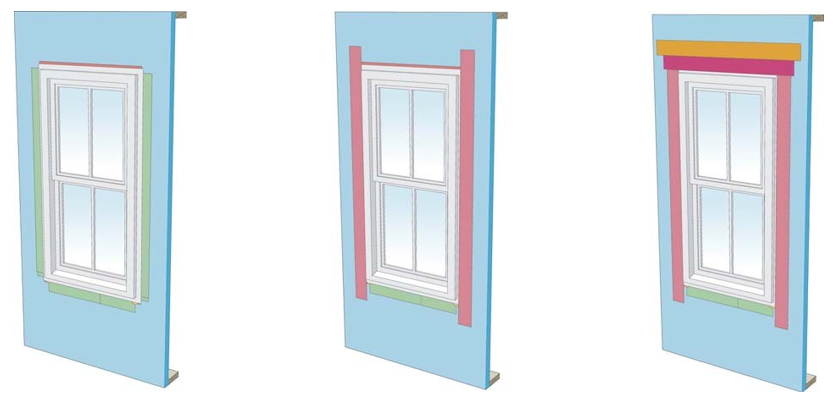
7. Install window plumb, level, and square as per manufacturer's instructions.
8. Install jamb flashing.
9. Install drip cap (if applicable); install head flashing; tape head flashing; air seal around the perimeter on the interior with sealant or low expanding foam.