Spring Tutorial: First Spring Application
Once you are done with the installation, you are ready to develop your first application in Spring. For that, you need to follow five simple steps:
- Create the Bean.java class
- Create a XML/ configuration file
- Create the main class
- Load the required jar files
- Run the application
Let's get started with the first step.
Step I: Creating the Bean class:
- For this go to File > New > Java Project.
- Now to create a package, right click on Project > New > package.
- Name the package and again right click on New > Class.
- Here is an example of Student bean class.
package org.edureka.firstSpring;
public class StudentBean
{
String name; public String getName()
{ return name; }
public void setName(String name)
{ this.name = name; }
public void displayInfo()
{ System.out.println("Hello: "+ name); }
}
- This is a simple bean class, containing only one property name with its getters and setters method. This class contains one extra method named displayInfo() that prints the student name by the hello "student name" message.
Step II: Create a XML file
Right click on src > New > Other > XML File
Step III: Create the main class
- Right click on package > New > Class
- Here is an example of StudentDemo class:
package org.edureka.firstSpring;
import org.springframework.context.ApplicationContext;
import org.springframework.context.support.ClassPathXmlApplicationContext;
public class StudentDemo
{
public static void main(String[] args)
{
ApplicationContext appCon=new ClassPathXmlApplicationContext("StudentConfig.xml");
StudentBean factory=(StudentBean)appCon.getBean("studentbean");
factory.displayInfo();
}
}
Step IV: Load the jar files
- Here is the list of the jar files needed. You have to download it and add it to your library.

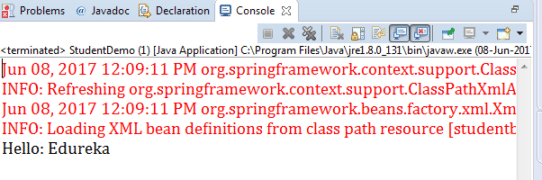
- You can now test your code by running the StudentDemo class. You can see in the below output that the name Edureka is injected by the ApplicationContext at the run-time. Likewise you can change the name any time you want, just by changing the name in the configuration file.