Configure A View Connection Server To Use An NPS Server As An Authenticator
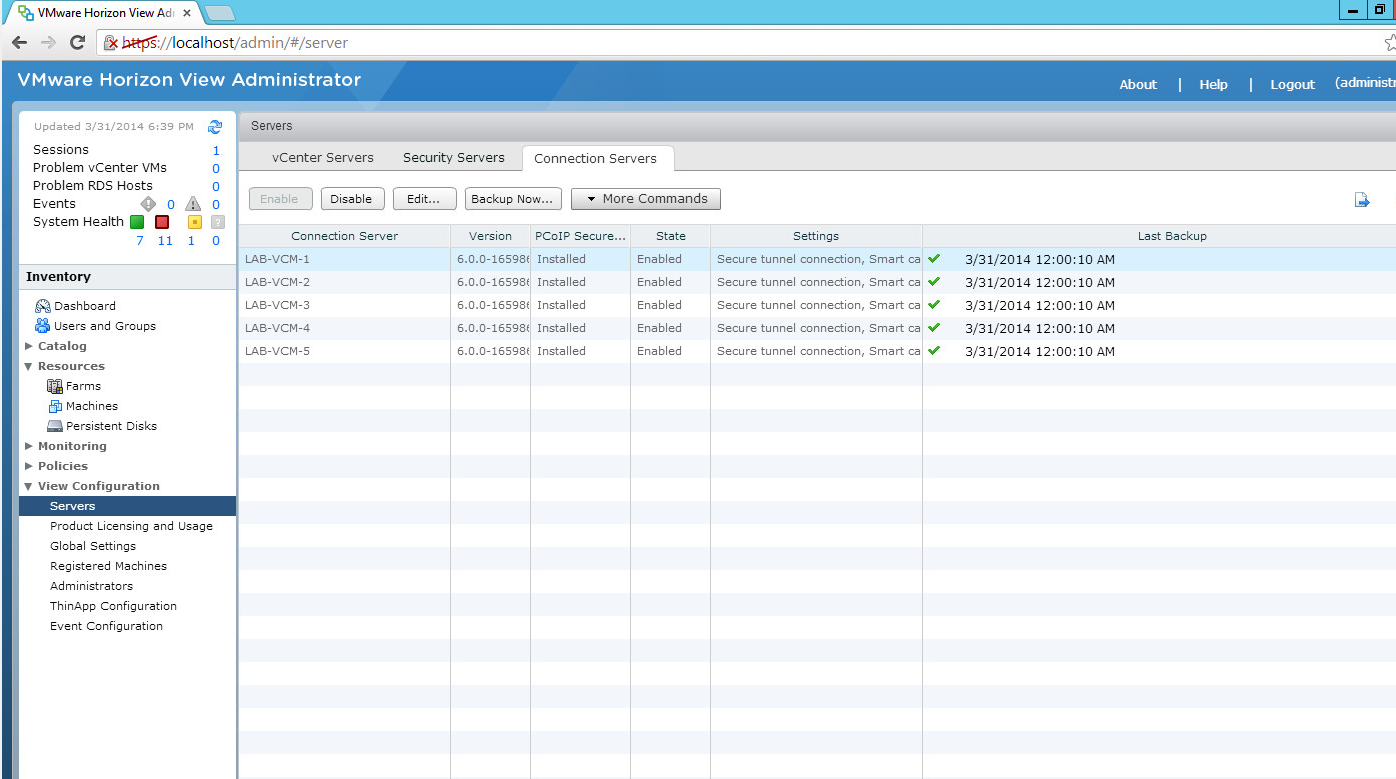
To begin configuration of a View Connection Server to use an NPS servers as an authenticator, log in to the View Administratorconsole as Administrator.
- Under the View Configuration menu, choose Servers.
- Click the Connection Servers tab. Choose theConnection Server instance where you want to set up RADIUS authentication.
- Click Edit to configure it.
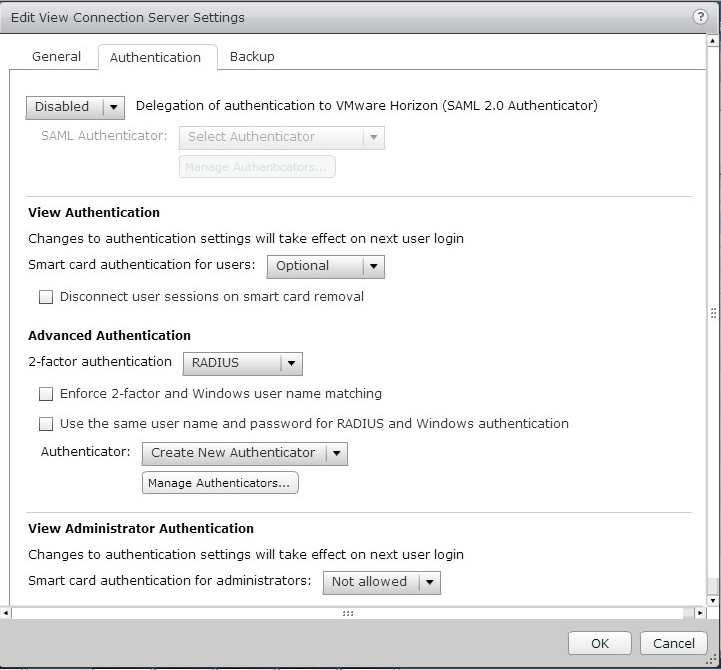
- Click the Authentication tab.
- Under Advanced Authentication, in the two-factor authentication field, choose RADIUS.
- In the Authenticator field, choose Create New Authenticator.
- Click OK.
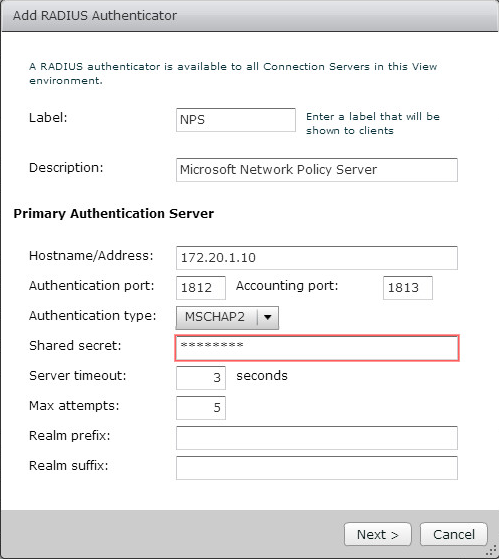
- The Add RADIUS Authenticator window opens. For Hostname/Address, enter the NPS server IP address.
- For Authentication port, use the default value 1812.
- For Accounting port, enter the accounting port value if you configured RADIUS accounting in the NPS server. By default it is 1813. If you did not configure accounting, enter 0.
- For Authentication type, choose MSCHAP2 as configured in the previous NPS server.
- Enter your Shared secret as configured in the previous NPS server.
- Click Next.
- The Secondary Authentication Server window opens. To accept the default value, click Finish.
 In
the
In
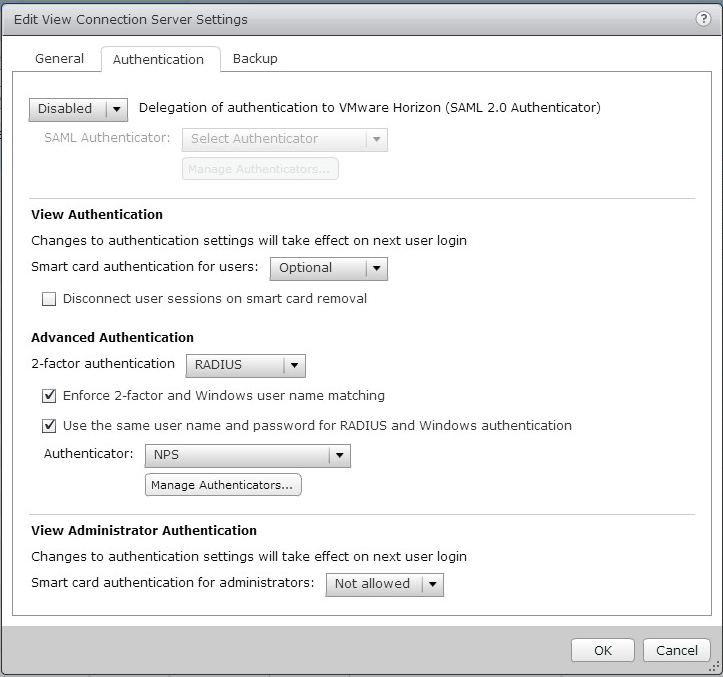
the - Edit View Connection Server Settings window, click the Authentication tab.Under
- Advanced Authentication,select Enforce 2-factor and Windows user name matching.
- Select Use the same name and password for RADIUS and Windows authentication..
- Click OK.
You have successfully configured a View Connection Server to use an NPS server as an authenticator. You are now ready to validate and confirm results of your configuration.